67 days. That’s all I
have left until the much anticipated arrival of my Hannah Banana. I am starting to feel the time crunch, but luckily
my husband and I have been trying to take advantage of most weekends to finish
up big projects around the house, which includes landscaping and a deck in our
backyard to cut back on all the dust that trails into our home after the dogs
have been out. As much progress as we
have made, it still seems to that we’ve hardly made a dent in the list. Last weekend after we put Sweet Pea to bed we got to work on painting the nursery and
actually got most of it done in an hour and a half (there are a few touch ups
that need to be done in order for it to be completely off of my list). During
our painting, I pulled something twisting around, so I have been feeling kind
of useless for most of this week.
However, I have saved a few projects that don’t require me to move
around too much just for weeks like this.
When trying to think up a nursery theme, I thought woodland
creatures would be cute since it could work for a boy or girl. I am also weirdly obsessed with all things
that have to do with moose…I don’t know why.
I think they are pretty cool animals.
Must be that Alaskan Chick in me... So, with a theme in mind, I jumped
onto Etsy for some inspiration. I
started looking at mobiles. However,
every store that had one wanted at least $90+ for a basic mobile made from the
mechanical, plastic crosses you can buy from Michaels. I was more or less resolved from there on out
that I could totally manage making my own mobile for Hannah’s room to save a
little money for other projects. Here is
what I came up with:
Woodland Creature Mobile Tutorial
Materials:
12” Bamboo embroidery inner hoop9” Bamboo embroidery inner hoop
Epoxy
Felt or paper themed mobile accessories
Beads
Thread
Fishing swivel
Key chain ring
Tools:
Ruler or tape measurePencil
Hacksaw
Safety glasses
Drill and 1/16” bit
Fine grit sandpaper
Toothpicks
Paper plate
Clamps
Scissors
Needle
Step 1: Make or
procure your mobile themed accessories to hang.
Try to envision the design since you will only have 9 different points
to hang from. The longest part of this
project was waiting on the felt animals to ship.
I bought my woodland animals from MiracleInspiration on Etsy. The seller lives in the Ukraine, but I got my purchase within 10 days (even with it having to go through customs). Her workmanship is absolutely wonderful. I would definitely recommend using this shop for fun felting projects:

The other felt accessories came from Michaels. I just loved the colors and thought I would fill in with these as I saw fit:

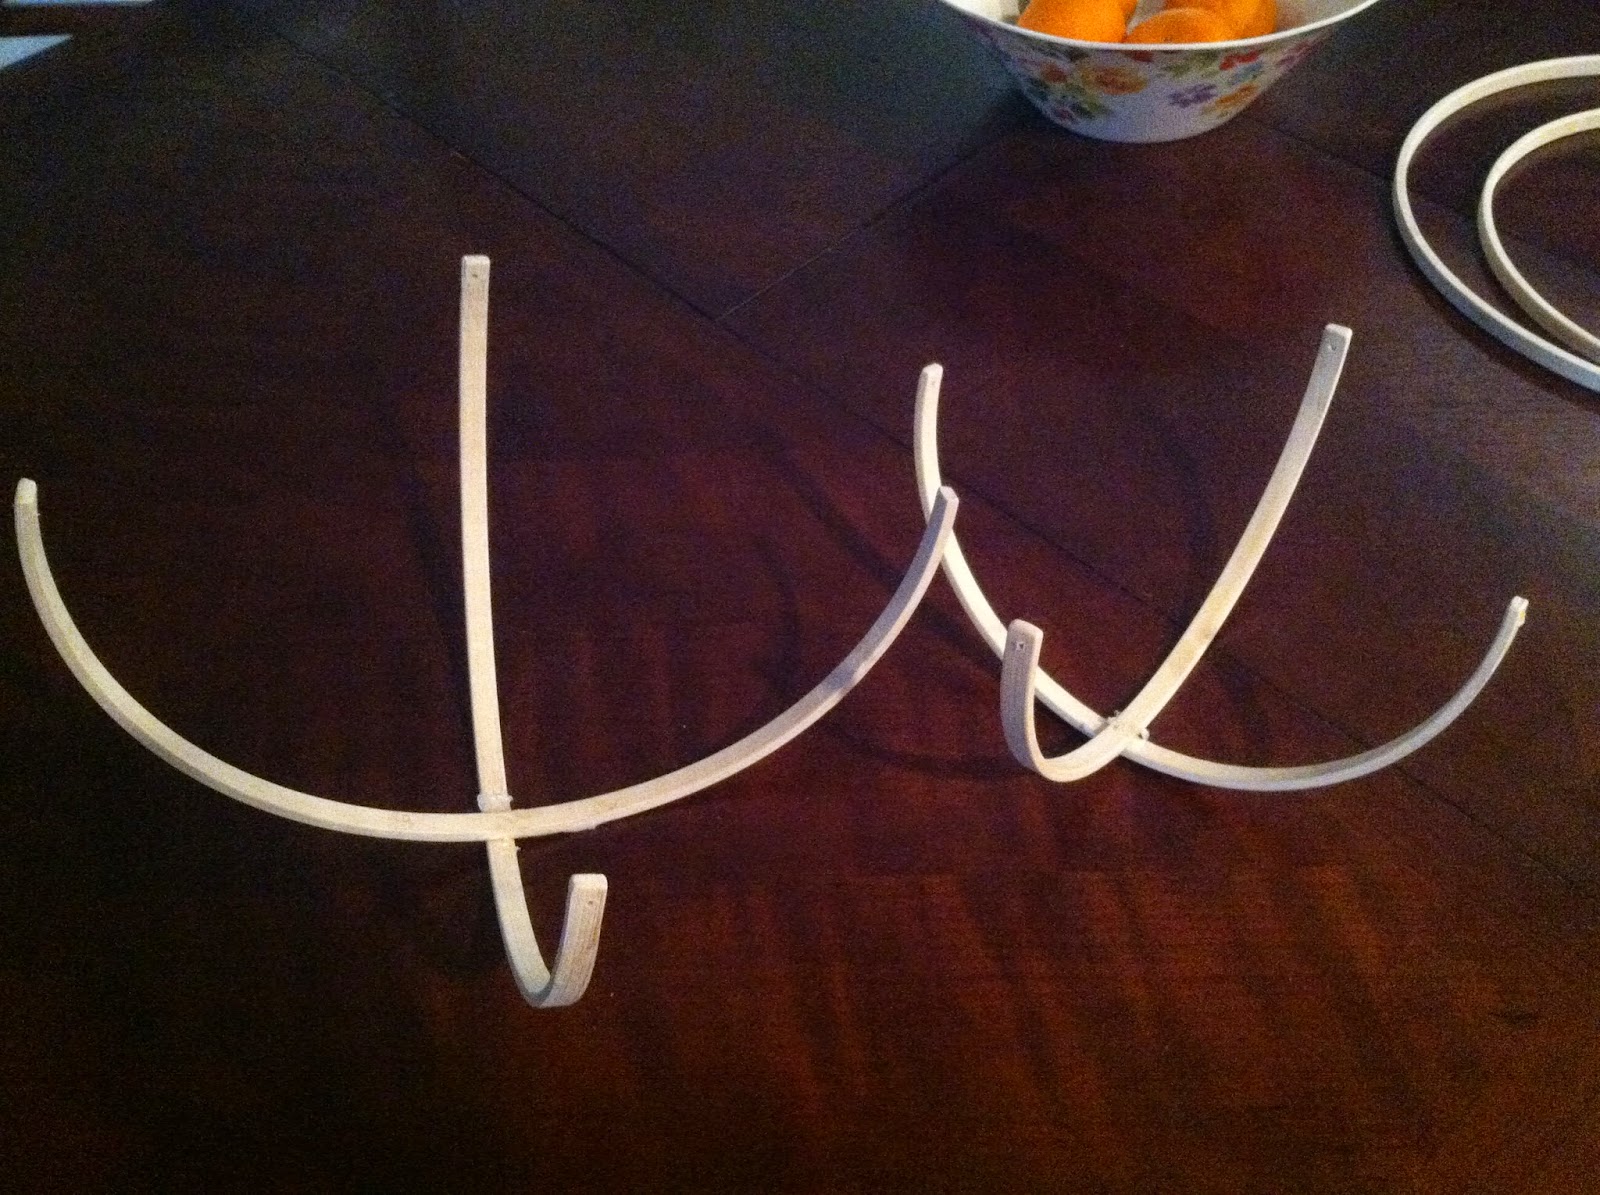
Step 3: Use a drill and 1/16” bit to make holes at the ends of the now semi-hoops. This part made me the most nervous since the wood could have easily cracked, but it worked out just fine. Also, your safety glasses should still be on…

Step 4: Use a fine
grit sand paper to round out the edges of the semi-hoops and get rid of any
jagged splinters from the holes.
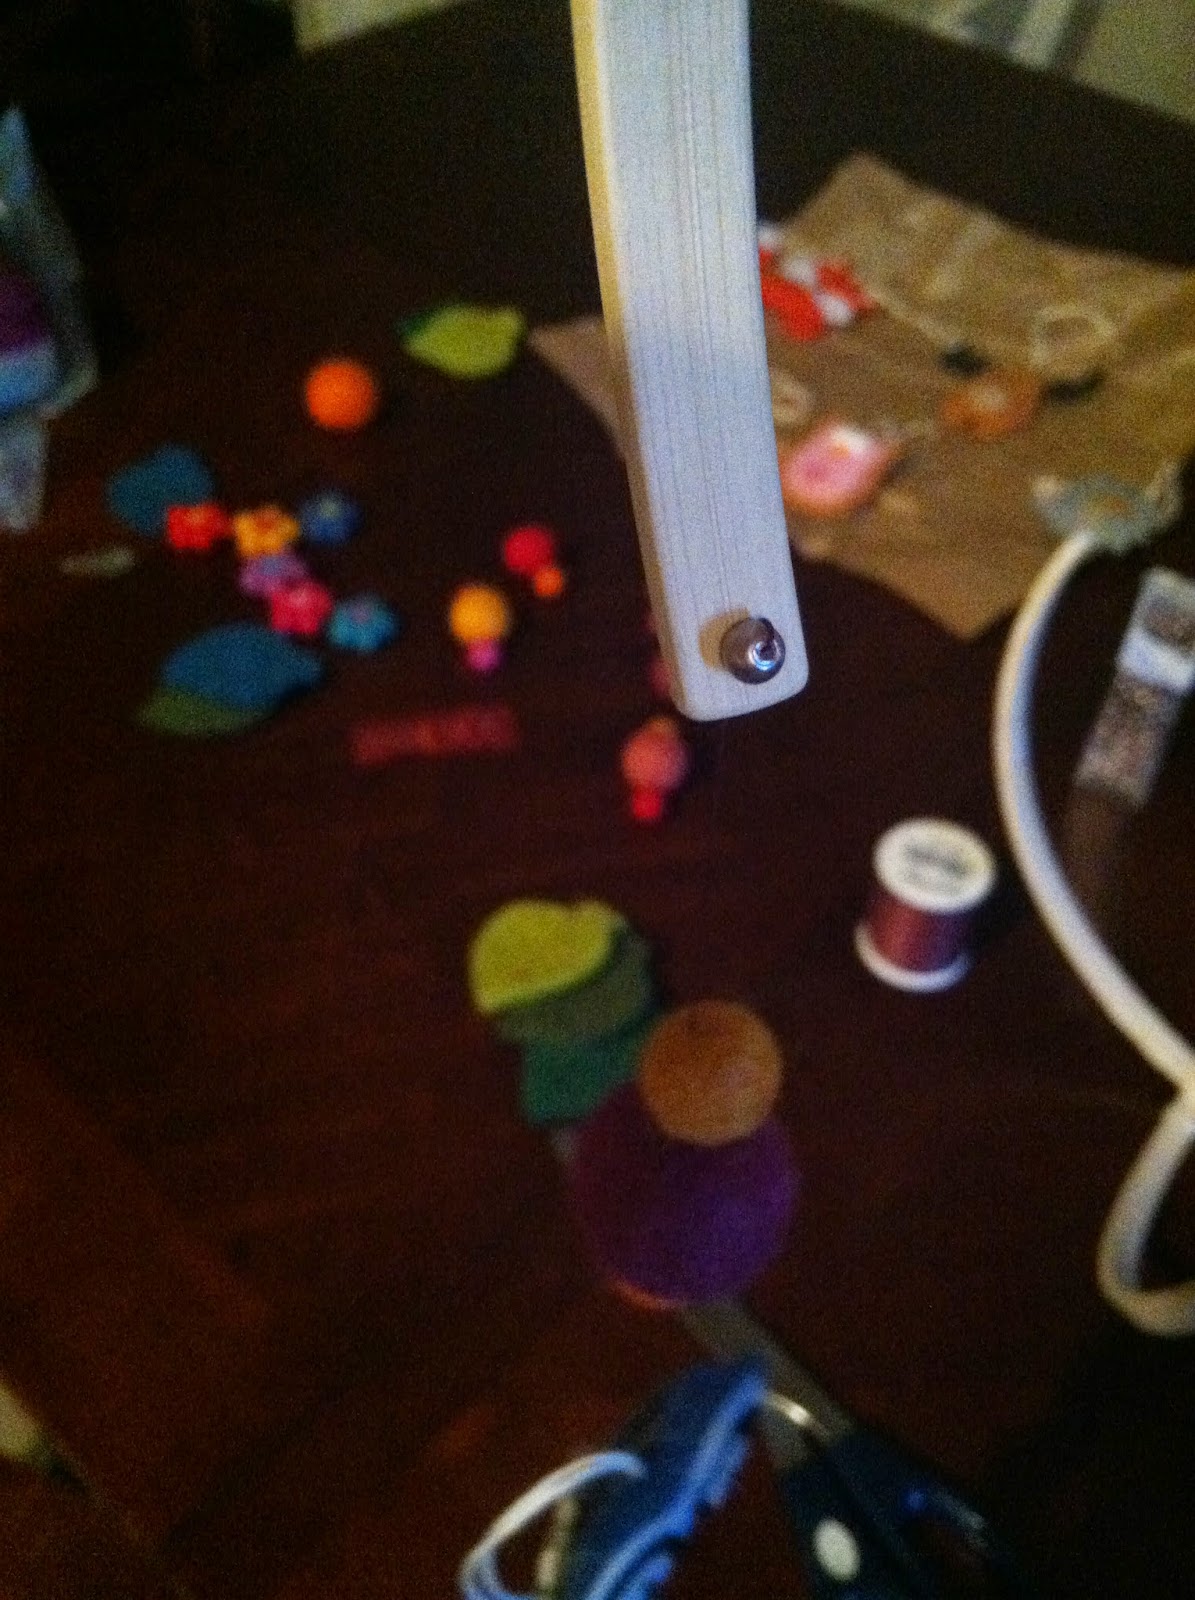
Step 5: Gather your
epoxy, a paper plate, toothpicks and clamps.
Mix some epoxy on the paper plate with a toothpick. Do this in a well ventilated area since epoxy stinks... Gather up a dollop of epoxy onto your
toothpick and place on the crest of one of the semi-hoops. Set the other similarly sized semi-hoop
directly on top of the epoxy at a perpendicular and use the clamp to
secure. Set aside and allow to dry
completely (shouldn’t take more than 10 minutes since epoxy dries so
quickly). Repeat with the other set of
semi-hoops.
 |
| My messy epoxy...I used too much. A little goes a long way. |
Step 6: Once the
hoops are dry, you are ready to start stringing on your mobile
accessories. I decided to use thread to
string my accessories instead of fishing line because it would pass easily
through my felted pieces with a needle and hang straight with little weight
(since none of my felt pieces weighed much). In
order to secure the thread to the mobile ends, I knotted a bead to one end of the string and strung it through from the inside of the mobile structure. It
should look like this:

Step 8: Attach a fishing line swivel to a key chain ring. Then tie one end of some thread to the swivel and the other end to the top of the mobile. You are now complete and have a fantastic mobile to hang in your sweet baby’s room!
.jpg)
And just for fun...an action shot!

- Casey
No comments:
Post a Comment